


SHOP ALL OF OUR GRAIN BIN ATTACHMENTS!
FREE SHIPPING IN THE LOWER US!
Description
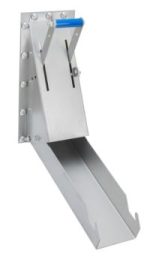
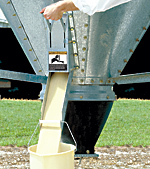
Gain easy access to unloading your feed bins and fill your buckets without crawling underneath. This is the easiest, most effective way to draw small amounts of material from your bin and certainly the most convenient when using 5-gallon pails.
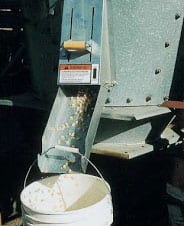
Pushing the handle up to slide open the gate mounted on the side of the hopper. Fill a teacup, a bucket, or a feed cart with ease. Pull the same handle down to slow the flow or close the gate. It's easy, quick, and a one-handed job.
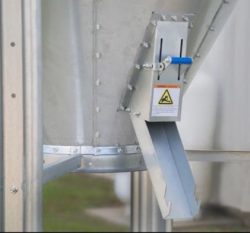
This convenient means of unloading is designed to be mounted to the side of the hopper section of a metal bin
Hopper Valve Pictures

Feed Bin Side Slide Valve Specifications
- Mounts on new or old feed bins
- Mounts on a flat surface
- The hole required in the bin is 2-7/8" x 5-3/8"
- Comes with an adhesive-backed template
- Mounts on bins with auger systems
- Can be padlocked
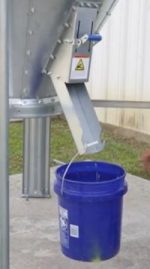
- Tabs on the chute allow a bucket to be hung below the hopper valve
- Approximately 12 pounds
- 1-year warranty
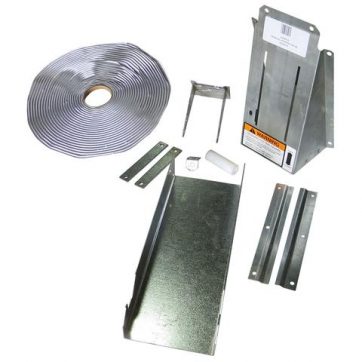
Includes:
- (1) Shroud
- (1) Slide Handle
- (1) Handle Tub
- (1) Chute
- (2) Rail Plates
- (2) Header Plates
- (1) Lock Plate, Hardware/Sealant
Hopper Valve Installation Video
Product Description
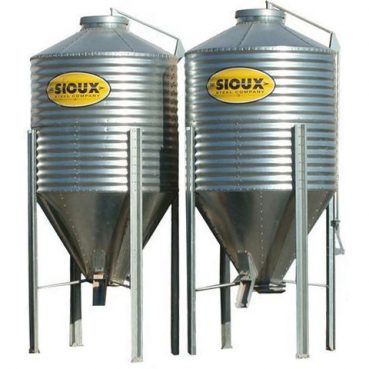
Upgrade your feed handling system with our Hopper Valve Chute, designed for optimal performance and ease of use. This chute is recommended for use exclusively with 9’ (228 mm) diameter, 3-ring tanks or smaller, accommodating a maximum feed capacity of 15 tons (13,600 Kg).
Key Guidelines for Installation:
- Size Compatibility: Ensure that the Hopper Valve Chute is used only with 9’ diameter, 3-ring tanks or smaller, optimizing its efficiency within this specific size range.
- Mounting Height: The chute should be mounted no higher than two feet (.61 m) above the hopper collar, ensuring proper functionality and seamless feed flow.
- Empty Feed Tank: Before starting the assembly of the Hopper Valve Chute, the feed tank must be empty, with no bridges present. This ensures a smooth and unobstructed installation process.
- Installer Safety: For the installer's safety, it is recommended to wear a long-sleeve shirt during the assembly of bolts from the inside of the tank. This precaution minimizes the risk of scrapes and enhances the overall safety of the installation process.
Installation Guidelines:
- New Tank Installations: For new tank installations, it is advisable to install the Hopper Valve Chute before the Upper Boot and Unloader. This sequencing allows any metal shavings and dropped parts to fall through to the ground, preventing interference with subsequent components.
- Existing Tank Installations: On existing tank installations, empty the Unloader of feed and remove access plates before installing the Hopper Valve Chute. This step ensures that any metal shavings and dropped parts are removed before the system is put back into operation.
Invest in our Hopper Valve Chute for a reliable and efficient feed handling solution. Follow the recommended guidelines for installation to maximize the performance and longevity of your feed handling system.
Hopper Valve Installation Assembly & Guidelines
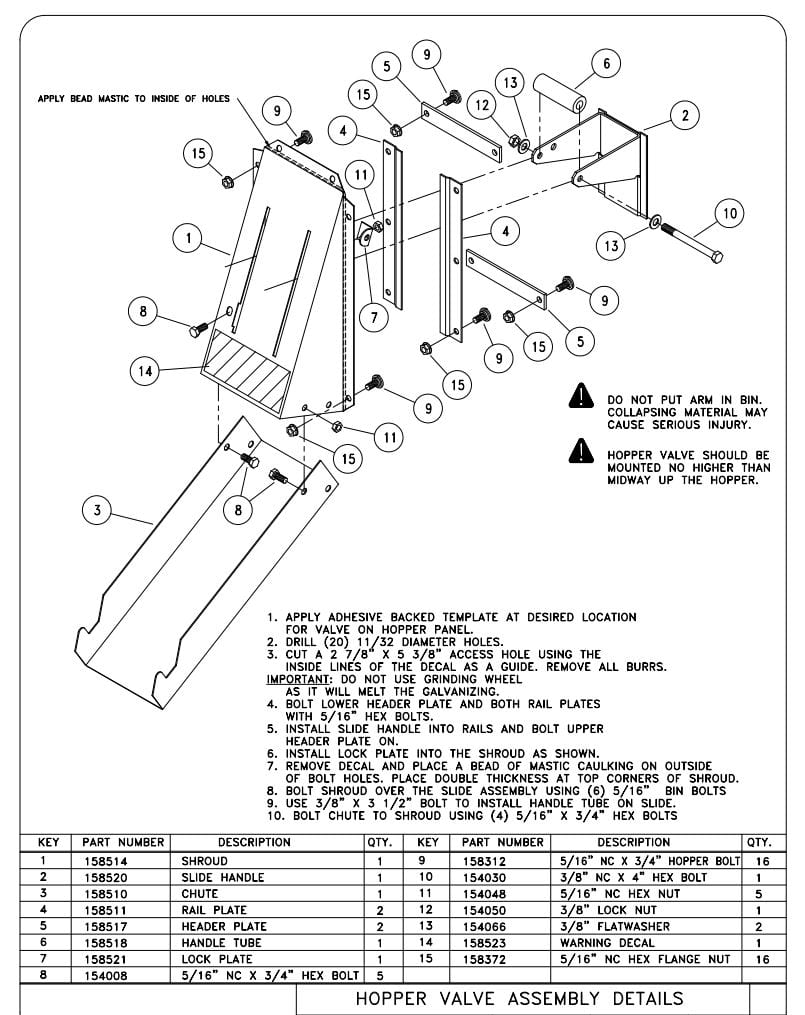
- Apply the adhesive-backed template at the desired location for the valve on the hopper panel.
- Drill (20) 11 /32 diameter holes
- Cut a 2 7 /8" x 5 3/8" access hole using the inside lines of the decal as a guide. Remove all burrs.
- Bolt the lower header plate and both rail plates with 5/1 6" hex bolts.
- Install the slide handle into the rails and bolt the upper header plate on.
- Install the lock plate into the shroud as shown.
- Remove the decal and place a bead of mastic caulking on the outside of the bolt holes. Place a double thickness at the top corners of the shroud.
- Bolt shroud over the slide assembly using (6) 5/16" bin bolts.
- Use the 3/8" x 3 1 /2" bolt to install the handle tube on the slide.
- Bolt chute to shroud using (4) 5/16" x 3/4" hex bolts.
SLIDE VALVE DIAGRAM

Pictures of the side-mounted hopper slide valve
You don't need to climb underneath your large-diameter bins to fill 5-gallon buckets. The task is made simple and easy with this bolt-on, side-mounted grain bin slide valve. It even has a notch to hold the handle of the 5-gallon bucket out of the way while it's being filled. The installation is straightforward, as you cut a hole in the bottom Taper Hopper section of your bin and bolt the slide valve directly to it. This kit comes with all the necessary mounting hardware as well as ceiling strips to keep water at bay.
Eliminate the backbreaking effort of sliding a bucket in and out from under your bin with this bulk grain bin slide valve from Barn World.
Mounted below on the Metal Feed Bins
Below are all the parts that come with the kit:
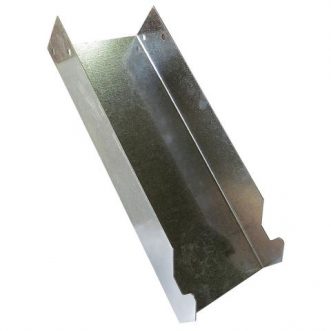
Discharge Chute
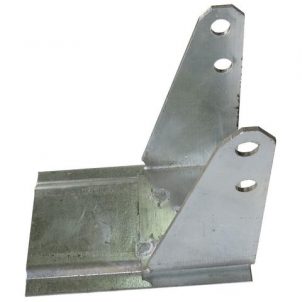
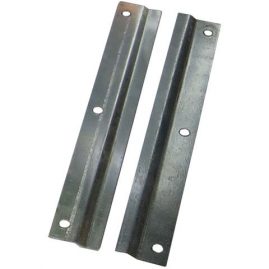
Feed bin slide bracket
The back side of the feed discharge chute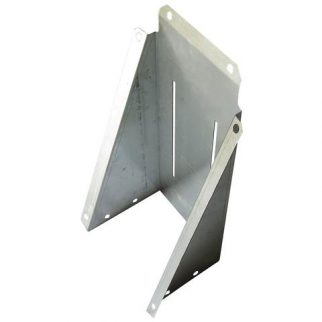
Front of the feed valve case
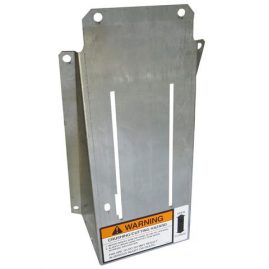
Sturdy rails
These strong rails provide support and allow for the smooth sliding of the valve handle and controllable grain discharge rates
Pictures of the Slide Valve Mounted to the Grain Bin Hopper

Product Review: Side-Mounted Slide Valve
As a farmer, feeding cattle efficiently is a top priority, and the Side Mounted Slide Valve has proven to be a game-changer for my operation. This ingenious device allows me to unload feed from the side of my grain bin, and the benefits have been substantial.
Convenience at Its Best
One of the standout features of the side-mounted slide valve is its convenience. Before installing this valve, I had to climb directly under the grain bin to release feed, which was not only time-consuming but also physically demanding. Now, with the slide valve, I can easily control the flow of feed from the side of the bin using a simple handle. This setup has made my daily feeding routine much smoother and quicker in my five-gallon buckets.
A Back-Saver
For anyone who has spent years farming, the toll on their back is a real concern. The side-mounted slide valve has significantly reduced the strain on my back. I no longer need to bend and twist awkwardly to access the feed. Instead, I can comfortably stand and fill 5-gallon buckets with ease. This improvement in ergonomics has made a noticeable difference in my daily comfort and long-term health.
Ease of Operation
Operating the slide valve is incredibly straightforward. The handle is sturdy and provides excellent control over the feed flow. Whether I need to fill a single bucket or multiple, I can do so with precision, avoiding any spills or wastage. The valve’s design ensures that it operates smoothly, and I haven’t experienced any jams or issues since installation.
Durability and Quality
This slide valve is built to last, with robust materials that withstand the demands of daily use. Knowing that I can rely on this valve for the long haul gives me peace of mind.
Overall Impact
Since incorporating the side-mounted slide valve into my feeding routine, I’ve experienced a significant boost in efficiency and convenience. It has streamlined my operations, saved my back from unnecessary strain, and made the task of feeding my cattle much more manageable. This product has truly been a valuable addition to my farm, and I highly recommend it to any farmer looking to improve their feeding system.
In conclusion, the Side Mounted Slide Valve is a must-have for farmers. Its convenience, ease of operation, and ergonomic benefits make it an excellent investment. If you’re looking for a way to make your feeding routine more efficient and less physically taxing, this slide valve is the perfect solution.
Video Installation Text
The Hog Slat Hopper Valve kit offers a convenient solution for filling individual feed buckets or carts directly from the bin. It mounts to feed bin hopper cones, providing access to bin contents without running the auger.
Installing the valve on your bin is a straightforward process. The tools you’ll need include a drill with a 3/8-inch bit that can penetrate steel, a reciprocating saw, a metal punch or Phillips screwdriver, and a tape measure. Always wear the appropriate personal protective equipment whenever working on a project.
Using a tape measure, center the provided stick-on template on the lower hopper cones approximately 6 inches from the bottom. Once centered, outline the template with a marker. Then, remove the backing from the adhesive and stick the template to the cone where you just outlined it.
After the template is in place, drill a hole large enough to allow you to cut out a rectangle with the reciprocating saw. We advise not to use a grinding wheel to cut the hole, as the heat generated from grinding can melt the galvanizing and make the surface vulnerable to rust.
Once finished, drill holes in all eighteen areas marked on the template. After the holes are drilled, go ahead and remove the sticker from the bin. Using the provided adhesive caulk tape, place strips of caulk along each side of the precut bolt holes in the mounting plate. You’ll need to apply this caulk in the same manner on both sides of the mounting plate.
Now slide the valve door into the guides on the mounting plate and make certain it’s seated properly. After the valve door is in place, join the shroud with the mounting plate, making sure you align the bolt holes. Reach into the bin and place a bolt through one of the holes you drilled at the top. Now match that with the corresponding hole on the mounting plate and shroud. Before tightening it down with a nut, use the metal punch to align all the bolt holes on the plate with those drilled into the bin. Once the holes are aligned, insert the rest of the bolts and tighten them down with a drill.
After the valve assembly is secured to the bin, attach the locking bracket to the shroud. Flange nuts should be secured on the outside of the bracket. Use the provided hex bolt and washers to attach the handle to the sliding door and secure it with a locknut.
With the unit now attached to the bin, you can install the chute. Once again, make certain the flange nuts are secured on the outside of the chute. With the chute attached, you can now remove excess caulk with the metal punch or a putty knife.
Test the sliding door to ensure it moves smoothly. The holes on the handle should line up with the locking bracket, allowing you to secure the valve shut with a padlock or cotter pin.
That's all there is to it!